Articles

Articles

Bicycle Shorts | NY Times

Bicycle Shorts | NY Times

Ah, the Sun, the Wind, the Sights, the Seat
By JOHANNA JAINCHILL

WITH a poorly fitted seat or shorts that chafe, cycling can be a pain. Some of this year’s saddle and shorts designs can help make a ride more comfortable.

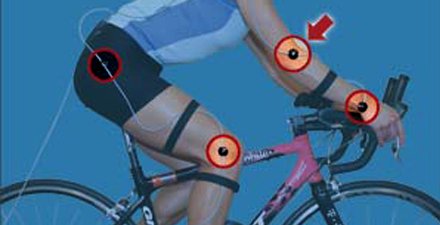
When choosing a saddle, cyclists should consider their “sit bones” – the bones that bear their seated weight – and the delicate nether-tissue that can get sore on a long ride. “To ensure comfort and prevent injury, when you sit on the saddle, the weight should be on sit bones and not soft tissue,” said Adam Baskin, an exercise physiologist and a USA Cycling elite coach.

For adequate support, a saddle should be wider than a rider’s sit bones. To measure the distance between them, Specialized, the cycling company, recently developed a synthetic rubber pad, available in bike shops, that customers plop down on, leaving an impression of each bone. (Online buyers can use this trick at home: Sit on a hard surface; use your fingers to find your bones; then position a ruler under your rear to measure the distance between them.)

Both men and women can feel pain and numbness in the soft-tissue area while on a bike. Cutouts in the middle of the saddle help alleviate pressure, but not everyone likes them. Some riders complain that they pinch.

Other saddles offer different technologies to ease a cyclist’s ride. A popular new saddle for men is the Fizik Arione. Designed to move like human ribs, its flexible sides don’t rub the thighs, and its long, flat surface supports sit bones.

Comfort is not determined only by saddle. The pad in cycling shorts – known as the chamois – offers a buffer between sit bones and saddle, Mr. Baskin said. Chamois used to feel and look bulky, but these days padding can be discreet and effective. Look for chamois that are welded to shorts rather than stitched to avoid seams that can irritate some cyclists.

BICYCLE SEATS

1. Specialized Dolce $42.99, www.specialized.com. Part of Specialized’s “body geometry” line, the Dolce is specially shaped to reduce direct pressure on women’s soft tissues.

2. Fizik Arione, $130, www.fizik.com This seat has flexible sides and a very light shell that appeals to both professional and recreational male riders.

3 AND 4. Specialized Avatar Gel, $74.99, www.specialized.com. Shown in two widths, 143 mm and 155 mm. Specialized is the first company to offer different widths for one saddle to fit varying sit bones. Both Avatar seats have hollow centers to decrease numbness and are made for men. (A women’s version comes out next year.)

5. Terry Butterfly Cromo, $49.99, www.teamestrogen.com. The seat’s long cutout goes forward because women’s soft tissue is up front. Its wide rear distributes pressure.

BICYCLE SHORTS

6. Harlot Freeride Knicker, $74.95, www.harlotwear.com. Designed by a cyclist frustrated with diaperlike padding, these knickers are lined with enough buffer for recreational cycling.

7. SheBeest Triple S Short, $74.95, www.teamestrogen.com. This short’s chamois, divided into four parts, can stretch in different directions without bunching up or causing chafing. The ultrashort length allows more of your thigh to tan.

8. Pearl Izumi Microsensor 3D Pro Short, $139.99, www.pearlizumi.com. This short’s welded chamois offers minimal padding but is denser where men need it and has flat seams to reduce friction.

9. Giordana Tenax Laser Short, $110, www.mygiordana.com . The welded, seamless chamois has crevices that allow airflow. Laser-made side holes increase ventilation.

Read More »

Accurately determining lactate threshold

Accurately determining lactate threshold

A graded exercise test or field test with actual blood lactate sampling is the best way to accurately determine one’s lactate threshold heart rate, pace or work load.

The term “anaerobic threshold” has long been used synonymously with “lactate threshold,” the blood lactate inflection point.  The word “anaerobic” is defined as “without air.”  This terminology is a source of argument, as the onset of blood lactate accumulation offers no information about anaerobic metabolism and oxygen is present even at maximal exercise intensities (in healthy individuals).

Early models proposed linkages between a lack of oxygen in the working muscle, lactate production and changes in pulmonary ventilation.  These causal linkages were attractive to researchers as lactate threshold could be estimated by observing the rate at which the athlete was breathing.  Researchers called the point at which pulmonary ventilation and carbon dioxide output begin to increase exponentially “ventilatory threshold,” observable as a substantial increase in breathing rate.  Unfortunately, researchers later discovered that factors such as carbohydrate intake, body mass, mode of exercise and speed of movement all can affect ventilatory and lactate threshold determination.

Studies on patients with McArdle’s syndrome place additional doubt on the anaerobic threshold – ventilatory threshold – lactate threshold relationship.  McArdle’s syndrome is a disorder where the sufferer lacks the enzyme phosphorylase, rendering them incapable of breaking down glycogen to form lactic acid.  Even though McArdle’s syndrome patients are incapable of producing lactic acid, they still demonstrate ventilatory threshold during graded exercise tests.  Therefore, it can be assumed that blood lactate levels are not directly linked to breathing rate.  In studies using healthy young male subjects, glycogen levels were also found to affect the relationship between lactate threshold and ventilatory threshold.  When glycogen was depleted in the subjects, ventilatory threshold occurred at a lower power output than lactate threshold, both occurring lower as compared to test results for well fed subjects.  Other studies have also found dissociation of the lactate threshold – ventilatory threshold relationship following an endurance training protocol.

Researchers sought an explanation as to why lactate threshold and ventilatory threshold sometimes occur simultaneously, even though blood lactate accumulation is not necessarily attributed to a lack of oxygen.  As exercise intensity increases, fast-twitch muscle fibers are recruited, producing lactic acid regardless of whether or not oxygen is absent.  Breathing rate during exercise is predominantly controlled by neural factors, mainly the carotid and aortic bodies, which are sensitive to the amount of oxygen and carbon dioxide present in arterial blood.  While these factors may cause lactate threshold and ventilatory threshold to occur simultaneously, it does not necessarily indicate that the working muscles lacked oxygen.

Even though lactate threshold and ventilatory threshold occur simultaneously in some instances, it is still inappropriate to classify their occurrences as an anaerobic threshold.   Recruitment of fast-twitch muscle fibers can cause lactate levels to rise regardless or whether or not the muscles are oxygen deficient.  Lactate levels rise simply because production and release of lactate occurs at a rate faster than removal mechanisms can accommodate.  Even at maximal exercise intensities, when the most oxygen is being utilized (VO2 max), the partial pressure of oxygen in the mitochondria never drops below critical levels.  There are simply too many variables affecting ventilatory rate to use it to establish an athlete’s training zones.

Article by Adam Baskin, M.A.

Baskin’s holds a degree in Clinical Exercise Physiology and he is a USA Cycling Elite Coach.  He works at the National Training Center in Clermont, Florida, conducting sports science tests including LT, VO2 max and bike fits.  Baskin is also a Category 1 rider on the road and track.

Read More »

Group Rides with a Purpose

Group Rides with a Purpose

I’m sure we know plenty of riders that base their entire training schedule around group rides.  They do the Tuesday night ride, Wednesday night worlds, the Thursday ride, the Saturday AM ride, the Sunday AM ride, etc., week in and week out.  That’s what all the fast guys do, isn’t it?  Is there some logic to this approach?  Too many riders get caught up in this cycle of excessive intensity and insufficient recovery time between intense workouts, never allowing for rebuilding and adaptation.  These riders subsequently ride at the same level all year, never experiencing the peaks associated with a sound, periodized program. While all group rides are not total hammer sessions, most of the time “1 rider is training, 2 riders is a race.”  The greater the number of riders that show up for a ride, the less control you’ll have over the volume, intensity, and ride dynamics.  Group rides aren’t all bad.  Cycling and triathlon are very social sports, and for many athletes, that’s the main reason they get off the couch and onto a saddle.  What is competition without someone else to beat, drop, or at least compare oneself against?  Training in groups can make time go by faster on long base miles rides, or provide a necessary push to get one out of their comfort zone.  Late in the season, when structured workouts may seem less appealing, group rides can be a refreshing way to maintain or fine tune fitness.

When selecting a group ride, make sure the intensity of the ride will allow you to stress the energy system that you are focusing on.  For example, if you are looking to develop your lactate energy system, seek out a ride with a continuous rotating paceline or steady climbs, as opposed to one with undulating terrain or numerous attacks.  Continuous pace-lining is similar to “over-under” efforts, where you alternate VO2 or anaerobic capacity type efforts(above race pace) with steady state intensity(race pace), forcing you to recover and settle back into a sustainable workload.  If the rotation is not hard or fast enough for you perform this kind of training, you can achieve the same goal throwing in some hard attacks and then attempting to hang onto the group when you get caught, repeating when sufficiently recovered.  When trying to attempting to train at endurance or recovery pace, simply use your best judgement.  If the pace goes up and you find yourself pushing the limits of your workout parameters, there is no shame in backing off and doing your own thing.  There may be some riders who will snicker about you sticking to your program or “getting dropped,” but you’ll have the last laugh when you’re smoking them at your priority event.  Recovery rides are almost always best performed by yourself, or with a non-racer friend or spouse(sometimes necessary for hall pass time).

When used in moderation and with a purpose, group rides can be a fun and effective way to help achieve your fitness goals.  Use your best judgment, be safe, and remember that there isn’t a million dollar prize waiting for you at the end of Wednesday night Worlds.

Read More »

Numb Hands?

Do your hands go numb when riding?

How many times have you been on a group ride when you see riders taking their hands off the bars, and shaking them, trying to restore feeling to their hands or fingers?  Have you ever been that rider?  While some riders may shrug off this numbness as a normal consequence of cycling, there is nothing normal about it.

There are a number of reasons why ones hands or fingers may become numb when cycling.  Numbness in ones hand is caused by compression of the ulnar and median nerve.  While this compression can sometimes be alleviated with a good pair of cycling gloves, many times this compression can only be fixed by modifying ones bike fit.  When positioning an athlete, it is important to achieve proper weight distribution.   Typically, an athlete should have approximately 40% of their weight at the handlebars and approximately 60% of their weight at the saddle.  Too much weight on the handlebars may cause numbness.  Having ones seat nose-down, or having excessive drop from the saddle may be the contributing factor.  Most bicycle saddles are designed to be ridden flat, relative to the ground, not nose-up or nose-down as you may see on the group rides.  Having ones seat high and handlebars low may look cool in the catalog or magazines, but it may also be the reason that you are uncomfortable on your bike.  Other contributing factors to numbness are bar angle, reach, and how ones brake hoods are positioned on the bar.  It is important to have a smooth transition from the bar to the brake hood, creating a flat resting place for ones hands.  This can be achieved by placing a straight-edge(ruler) on the bar drop, lowering the brake lever tip onto the straight edge during installation.  This method also helps insure that ones brake levers are level.  When gripping the brake hoods, wrists should be straight, not bent, relative to the forearm, and there should be roughly 25-35 degrees at the elbow.  Lastly, try not to put the “death grip” on the bars.  The handlebars should gripped firmly, but not to the point where it can contribute to numbness.

Hopefully these tips will help you make your next ride more enjoyable.  If you continue to experience numbness in your hands and fingers when riding, seek out a professional bike fitter.

Read More »

Named one of the top bike fitters in the country.

Named one of the top bike fitters in the country.

Triathlete Magazine named Adam Baskin as one of the top bike fitters in the country. It is my pleasure to announce that Triathlete Magazine has named me as one of the top bike fitters in the country. If you’re interested in scheduling a bike fit, please feel free to contact me directly. I look forward to hearing from you soon.

Read More »

Why Bike Fit?

Why Bike Fit?

Has some aspect of your bike simply never felt “right”? Have you ever experienced back, neck, shoulder, or wrist pain when riding? Knee, foot, or ankle pain? Do your hands, feet, or saddle region ever go numb? Are you looking to maximize the comfort and performance of your bicycle?

Whether you are a recreational or competitive rider, proper bicycle fit is critical to insure comfort and efficiency, making every ride a little more enjoyable. Proper bike fit, in tandem with improved pedaling mechanics, will allow you to ride faster, longer and more efficiently.

When performing a fit, our we use proven principles of bio-mechanics, anthropometric measurements and aerodynamics to find the position most conducive to one’s riding style, as well as reducing the risk of injury. Helping you find a neutral spine position that allows for maximum transfer of power to the pedals while maintaining efficiency and posture will not only reduce your risk of injury, but will lead to improved performance.

Our Retul and Dartfish 3D motion capture systems allows us to perform a comprehensive fitting from the cleats up, ensuring accurate joint angle measurements, as well as proper alignment in all three planes of movement.

All bike fit dimensions are documented on your fit form, allowing one to easily transfer the measurements to a second bicycle, or correctly re-assemble ones bike following packing/unpacking.  If for some reason, your ideal position cannot be obtained with your existing set-up, you will be provided with a list of recommended equipment changes in order to achieve your perfect fit.

Read More »

QFactor

Q-Factor

While the term “Q-Factor” may seem like the name of the latest Star Trek movie, it may actually be one of the most commonly overlooked adjustments when performing a bike fit. Q-factor is actually the lateral distance between the pedal mounting surfaces of your crank-arms, or effectively, the distance between your feet(stance width). In recent years, in an attempt to save weight, increase stiffness, and improve aerodynamics, bicycle bottom bracket and pedal axles have become shorter. Manufacturers have also released new “lower profile” versions of their crank-sets. For those with narrow hips, these changes allow one to get “narrower,” creating proper alignment and a more aerodynamic profile. Unfortunately for the non-narrow set, the human body simply hasn’t evolved fast enough to accommodate these equipment changes. While a “low-profile” crank or pedal may look cool on your bike, it may also be the source of your knee, hip, back, or foot discomfort.

If you’ve been on a group ride recently, or even if you’ve been watching the Tour de Lance coverage, you’ve probably noted the wide variance of pedals strokes in the peloton. Ideally, on a properly set-up bike, the head of the femur, the patella, and the second toe(2nd metatarsal head) should all be tracking in the same plane while pedaling. If your knees travel outside of that plane, chances are that you need to adjust some aspect of your position. When ones knees travel to the outside at the top of the pedal stroke, tight hips/glutes may be contributing factors, but insufficient Q-Factor is likely the cause. If ones knees appear to come in on the upstroke, or do the “high-jump” over ones top tube, typically arch supports or varus wedging are needed. Excessive Q-factor may also be the cause

Now that you’ve just dropped $500 on a set of trick carbon cranks, do you have to chuck them in the E-bay pile in favor of some mountain bike cranks? Probably not. Fortunately, a number of pedal manufacturers have incorporated Q-Factor adjustability into their pedal and cleat combinations. LOOK cleats have a small amount of lateral cleat adjustability, and their CX6 and CX7 pedals are some of the most adjustable pedals out there.

Read More »

Building The Perfect Pedal Stroke

Building The Perfect Pedal Stroke

By Adam Baskin

Have you ever felt like something just wasn’t right with your position on the bike?  Have you been fitted multiple times but still have a nagging injury?

While most bike shops and fitters are more than capable of putting you on the right size bike, and possibly even able to accurately dial in your seat height and fore-aft saddle placement, chances are that some aspect of your fit was overlooked. The most commonly overlooked aspect of bike fit occurs in the frontal plane – or perpendicular to the bike.

The aspect to which I am referring is knee tracking. If you commonly ride with other people or watch cycling on TV, you’ve probably noticed the variances in different rider’s pedal strokes. Some athlete’s knees come out at the top of the pedal stroke, while others dive in toward the bike at either the top or bottom of the pedal stroke. In an ideal world, the second toe, the patella and the head of the femur should all be in the same plane, for the entire pedal stroke. While many ride for years with improper alignment, more than likely, it will eventually catch up with them.

There are a number of ways to correct improper knee tracking. Cleat wedges, shoes inserts and Q-factor adjustment may be required to fine tune your mechanics. If your knees come out at the top of the pedal stroke, chances are that you have insufficient Q-factor. Q-Factor is defined as the lateral distance between the pedal mounting surfaces and the crank-arms. Insufficient Q-factor basically means that your feet are too close together. It may also be the cause of pressure on the lateral edge of the foot, or a sensation of pedaling with the side of one’s foot. The easiest way to correct this would be to move your cleats in.  If your cleats are already moved all the way in or your cleats/pedals have no lateral adjustability, additional spacing can be added between the pedal and crank arm in the form of washers.  Two to three millimeters of spacing can safely be added to each side without compromising the amount of pedal threaded into the crank arm. If your bicycle has an ISIS, Octalink or square taper crankset, a longer bottom bracket axle can also be used for the same result.

For knees that come in at the top of the pedal stroke, cleat wedging may be required.  Cleats wedges (available from www.bikefit.com) come in one degree increments and can be used with most pedal systems. Wedges are stackable and one to three wedges are typically used per side. Use of more than three wedges may make pedal engagement more challenging.

If your knees rotate in toward the down tube on the downstroke, in shoe orthotics, or insoles with arch support may be required to limit pronation and/or internal rotation of the tibia. Shoe inserts can be used in combination with cleat wedges if further correction is needed.

If you feel that you may need to try one of these strategies to correct your mechanics on the bike, seek out a certified bike fitter to assist you. Video analysis may be utilized to better diagnose the issue.


Baskin holds a degree in Clinical Exercise Physiology and is a Serotta Certified Bike Fit Technician as well as a USA Cycling Elite Coach.  He works at the National Training Center in Clermont, Florida, conducting sports science tests including bike fits, LT and VO2 max.  Baskin is also a Category 1 rider on the road and track.
Adam Baskin
Cat One Fitness, LLC
849 Arbor Hill Circle
Minneola, FL 34715

Read More »

Bike Fit Missing Something?

Is your bike fit missing something?

Have you ever felt like something just wasn’t right with your position on the bike?  Have you been fitted multiple times but still have a recurring or nagging injury?

While most bike shops and fitters are more than capable of putting you on the right size bike, and possibly even able to accurately dial in your seat height and fore-aft saddle placement, chances are that some aspect of your fit was more than likely overlooked.  The most commonly overlooked aspect of bike fit occurs in the frontal plane–or perpendicular to the bike.

The aspect to which I am referring is knee tracking.  If you commonly ride with other people or watch cycling on TV, you’ve probably noticed the variances in different rider’s pedal strokes.  Some athlete’s knees come out at the top of the pedal stroke, while others dive in toward the bike at either the top or bottom of the pedal stroke.  In an ideal world, the second toe, the patella and the head of the femur should all be in the same plane, for the entire pedal stroke.  While many ride for years with improper alignment, more than likely, it will eventually catch up with them.

There are a number of ways to correct improper knee tracking.  Cleat wedges, shoes inserts and Q-factor adjustment may be required to fine tune your mechanics.  If your knees come out at the top of the pedal stroke, chances are that you have insufficient Q-Factor.  Q-Factor is defined as the lateral distance between the pedal mounting surfaces of the crank-arms.  Insufficient Q-Factor basically means that your feet are too close together.  Insufficient Q-Factor may also be the cause of pressure on the lateral edge of the foot or a sensation of pedaling with the side of ones foot.  The easiest way to correct this would be to move your cleats in.  If your cleats are already moved all the way in or your cleats/pedals have no lateral adjustability, additional spacing can be added between the pedal and crank arm in the form of washers.  Two to three millimeters of spacing can safely be added to each side without compromising the amount of pedal threaded into the crank arm.  If your bicycle has an ISIS, Octalink or square taper crankset, a longer bottom bracket axle can also be used for the same result.

For knees that come in at the top of the pedal stroke, varus cleat wedging may be required.  Cleats wedges, available from www.bikefit.com, come in one degree increments and can be used with most pedal systems.  Wedges are stackable and one to three wedges are typically used per side.  Use of more than three wedges may make pedal engagement more challenging.

If your knees rotate in toward the down tube on the downstroke, in shoe orthotics or insoles with arch support may be required to limit pronation and/or internal rotation of the tibia.  Shoe inserts can be used in combination with cleat wedges if further correction is needed.

If you feel that you may need to try one of these strategies to correct your mechanics on the bike, seek out a certified bike fitter to assist you.  Video analysis may utilized to better diagnose the issue.

Article by Adam Baskin, M.A.

Baskin’s holds a degree in Clinical Exercise Physiology and is a Serotta Certified Bike Fit Technician as well as a USA Cycling Elite Coach.  He works at the National Training Center in Clermont, Florida, conducting sports science tests including bike fits, LT and VO2 max.  Baskin is also a Category 1 rider on the road and track.

Adam Baskin

(352) 241-7144, ext. 4296

National Training Center

1099 Citrus Tower Blvd.

Clermont, FL 34711

adam.baskin@orhs.org

www.usantc.com

Read More »

Common Mistakes in Interval Training

Common Mistakes in Interval Training

Interval training is an excellent way to increase fitness, build lean mass, and simulate the demands placed on the body by one’s specific sport.  Intervals can be performed indoors and out, with the athlete in ultimate control of the intensity, overload, recovery time and number of efforts.  Interval training is a great way to incorporate intensity in a manner that is structured, predictable, and sport specific.

For triathletes whose hectic work schedule doesn’t allow them to make group training rides and runs, intervals may be the only way to incorporate sport specific intensity.  In order to get the most out of interval training, there are a number of steps that should be taken to avoid common errors.

Intervals should not be performed prematurely.  Before beginning interval training, the athlete should develop a sufficient endurance base.  Depending on the age of the athlete and the number of years in sport, some may require a longer or shorter base period.  Typically, newer athletes should be primarily concerned with establishing and endurance base sufficient to complete their respective race distance; while more experience athletes, who already possess those endurance adaptations, can start incorporating interval training sooner.  Masters athletes may be encouraged to perform intervals year round, in order to maintain the adaptations gained in previous seasons.

Interval workouts should be planned strategically to produce the desired fitness adaptations at the desired point of time in one’s competitive season.  You don’t want to be flying in February if your “A” race is in July.  A tried-and-true strategy is for the athlete to progressively increase the intensity as the season progresses, with the greatest intensity in the weeks preceding the athlete’s priority event.

Intervals should be event or sport specific, ideally targeting the energy system(s) to be used in the event.  What might seem like a great workout may not necessarily improve performance in one’s sport.  One can manipulate the length of the effort and recovery time to target the desired energy system and increase the sport specificity of the workout.

An interval should be of sufficient length and intensity to tax the desired energy system.  All physiological processes have half-lives, and the human body doesn’t change energy systems at the flip of a switch. Therefore, it may take minutes to transition one from energy system to another within an interval effort.  For example, while the prevailing energy system for maximal 5-60 minute efforts is the lactate energy system, it takes an effort of at least 8 minutes to get a full 5 minutes in zone.  Lactate threshold intervals should therefore be 8 minutes of longer.  Similar methodology should be applied to VO2max and anaerobic capacity intervals.

In order to insure that an interval is being performed at the proper intensity, field testing or a lab determined lactate threshold value can be used to accurately establish one’s training zones.  On-bike power meters, heart rate monitors, GPS enabled devices(pace), and perceived effort are the most common ways to monitor intensity.

When performed at the correct intensity, the right time in one’s competitive season, and with sufficient recovery between sessions, intervals can be an extremely effective tool for taking your performance to the next level.

Read More »